

What effect does resin have on a painting of mine? I don't use it on each and every piece (although usually I am tempted to because I adore the results of a resin application), but when I do it adds such dimension and depth that I feel it draws you in to the piece even more. Keep in mind that epoxy resin will add a considerable amount of weight to a painting...this is something that clients need to factor in for shipping and also displaying a piece. Another factor to think about will be the high gloss finish...if the piece is to be hung in an area with direct or bright light, it may be a better idea to forego the resin and simply have a matte varnish applied instead. These are all things that I go over with clients in advance before a piece is commissioned.
Why do I use ArtResin and not any other brand of epoxy resin? There are several reasons why. I have used other brands in the past, and they each seemed to have their own issues. Either they cured too quickly or didn't self-level, and therefore the resin was uneven and lumpy, or bubbles would not dissipate, or there would be a yellowish cast over time as the painting aged. None of these were acceptable to me, so thankfully I discovered my holy grail epoxy...ArtResin! It is a conservation grade material that remains crystal clear since it has an anti-yellowing agent added in addition to a UV stabilizer. My art takes a lot of time, heart and soul to create, so the last thing I want included in my work is something that will diminish its effect or its value.
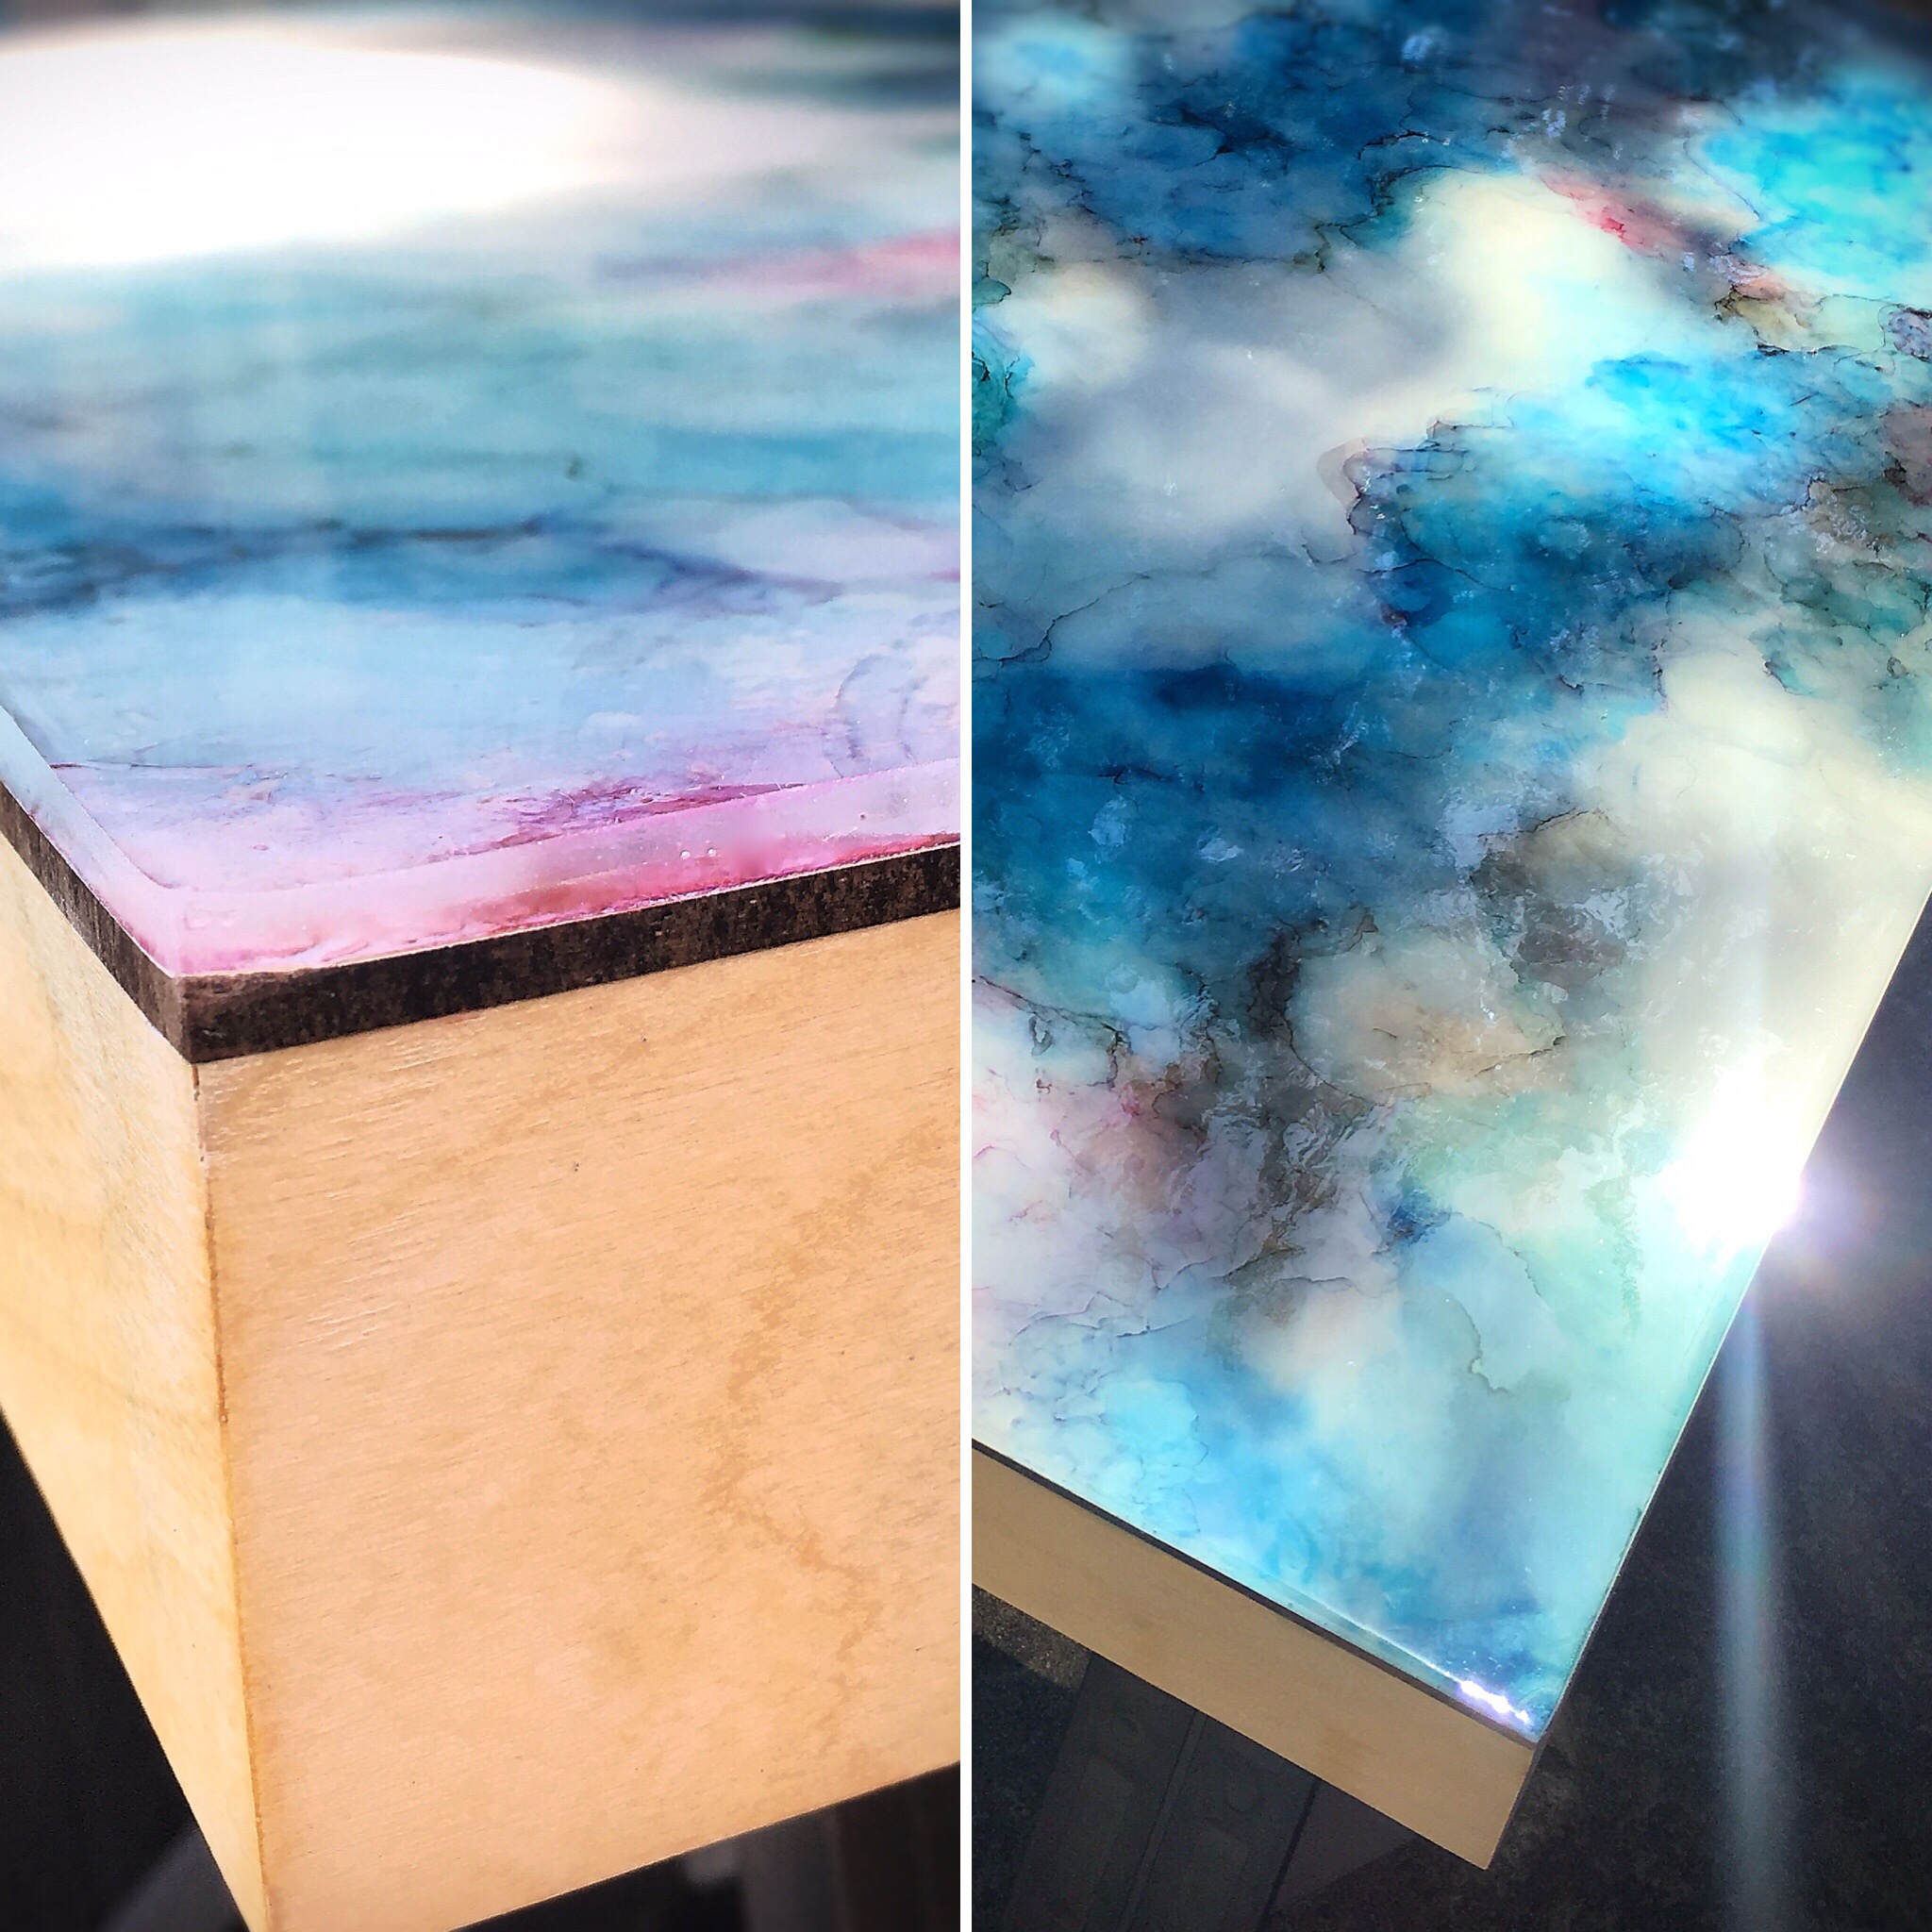
Below is an detail of an alcohol ink diptych I created before and after adding several coats of ArtResin. You can see that the edges of the ink were softened and give off a more ethereal quality once the resin has cured.

TOP: Alcohol ink before resin application. BOTTOM: Full resin coating over alcohol ink.
The process of applying ArtResin itself is not overly complicated, but it does take quite a bit of time and attention to detail. You will need to have a space where the piece can remain undisturbed for a minimum of 24 hours. By undisturbed, I mean...no dust, no bugs flying around, no curiously creative children, no hairy husky dogs (I have learned all of these the hard way). The temperature in the space needs to be average room temperature with low humidity. Since I live and work in the armpit of the South, I typically run a dehumidifier in my studio several hours before I begin resining a piece in the summer. In the winter, I run a space heater to make sure the immediate curing space stays a proper temperature as well.

To prepare the panels themselves, I create a barrier with painters tape around the edges of my panels. This creates a sharp edge once the resin has cured. Some artists pour the resin over the edge of their canvases and panels, which is also an option. With ArtResin, you simply pour a 1:1 ratio mix of the resin and the hardener. ArtResin's website has an awesome lil calculator so you know exactly the minimum product you will need to mix. Then, you set a timer for three minutes and stir the whole concoction up until you think your elbow will dislocate. Then you are ready for the fun part!

Please ignore the scruffy-looking artist in the background.

ArtResin offers an awesome spreader that enables you to spread the resin around quickly and evenly. I blew through my own pack of spreaders, so I improvised in the photo here and just used my stirring stick. Wear gloves for this! Now it's power tool time. ArtResin has a cool butane torch that will efficiently remove all the bubbles that rise up within the resin. I currently use a heat gun to achieve this, but the torch is on my list because I keep hearing that it is so much more effective.

poppin' bubbles...oddly satisfying.
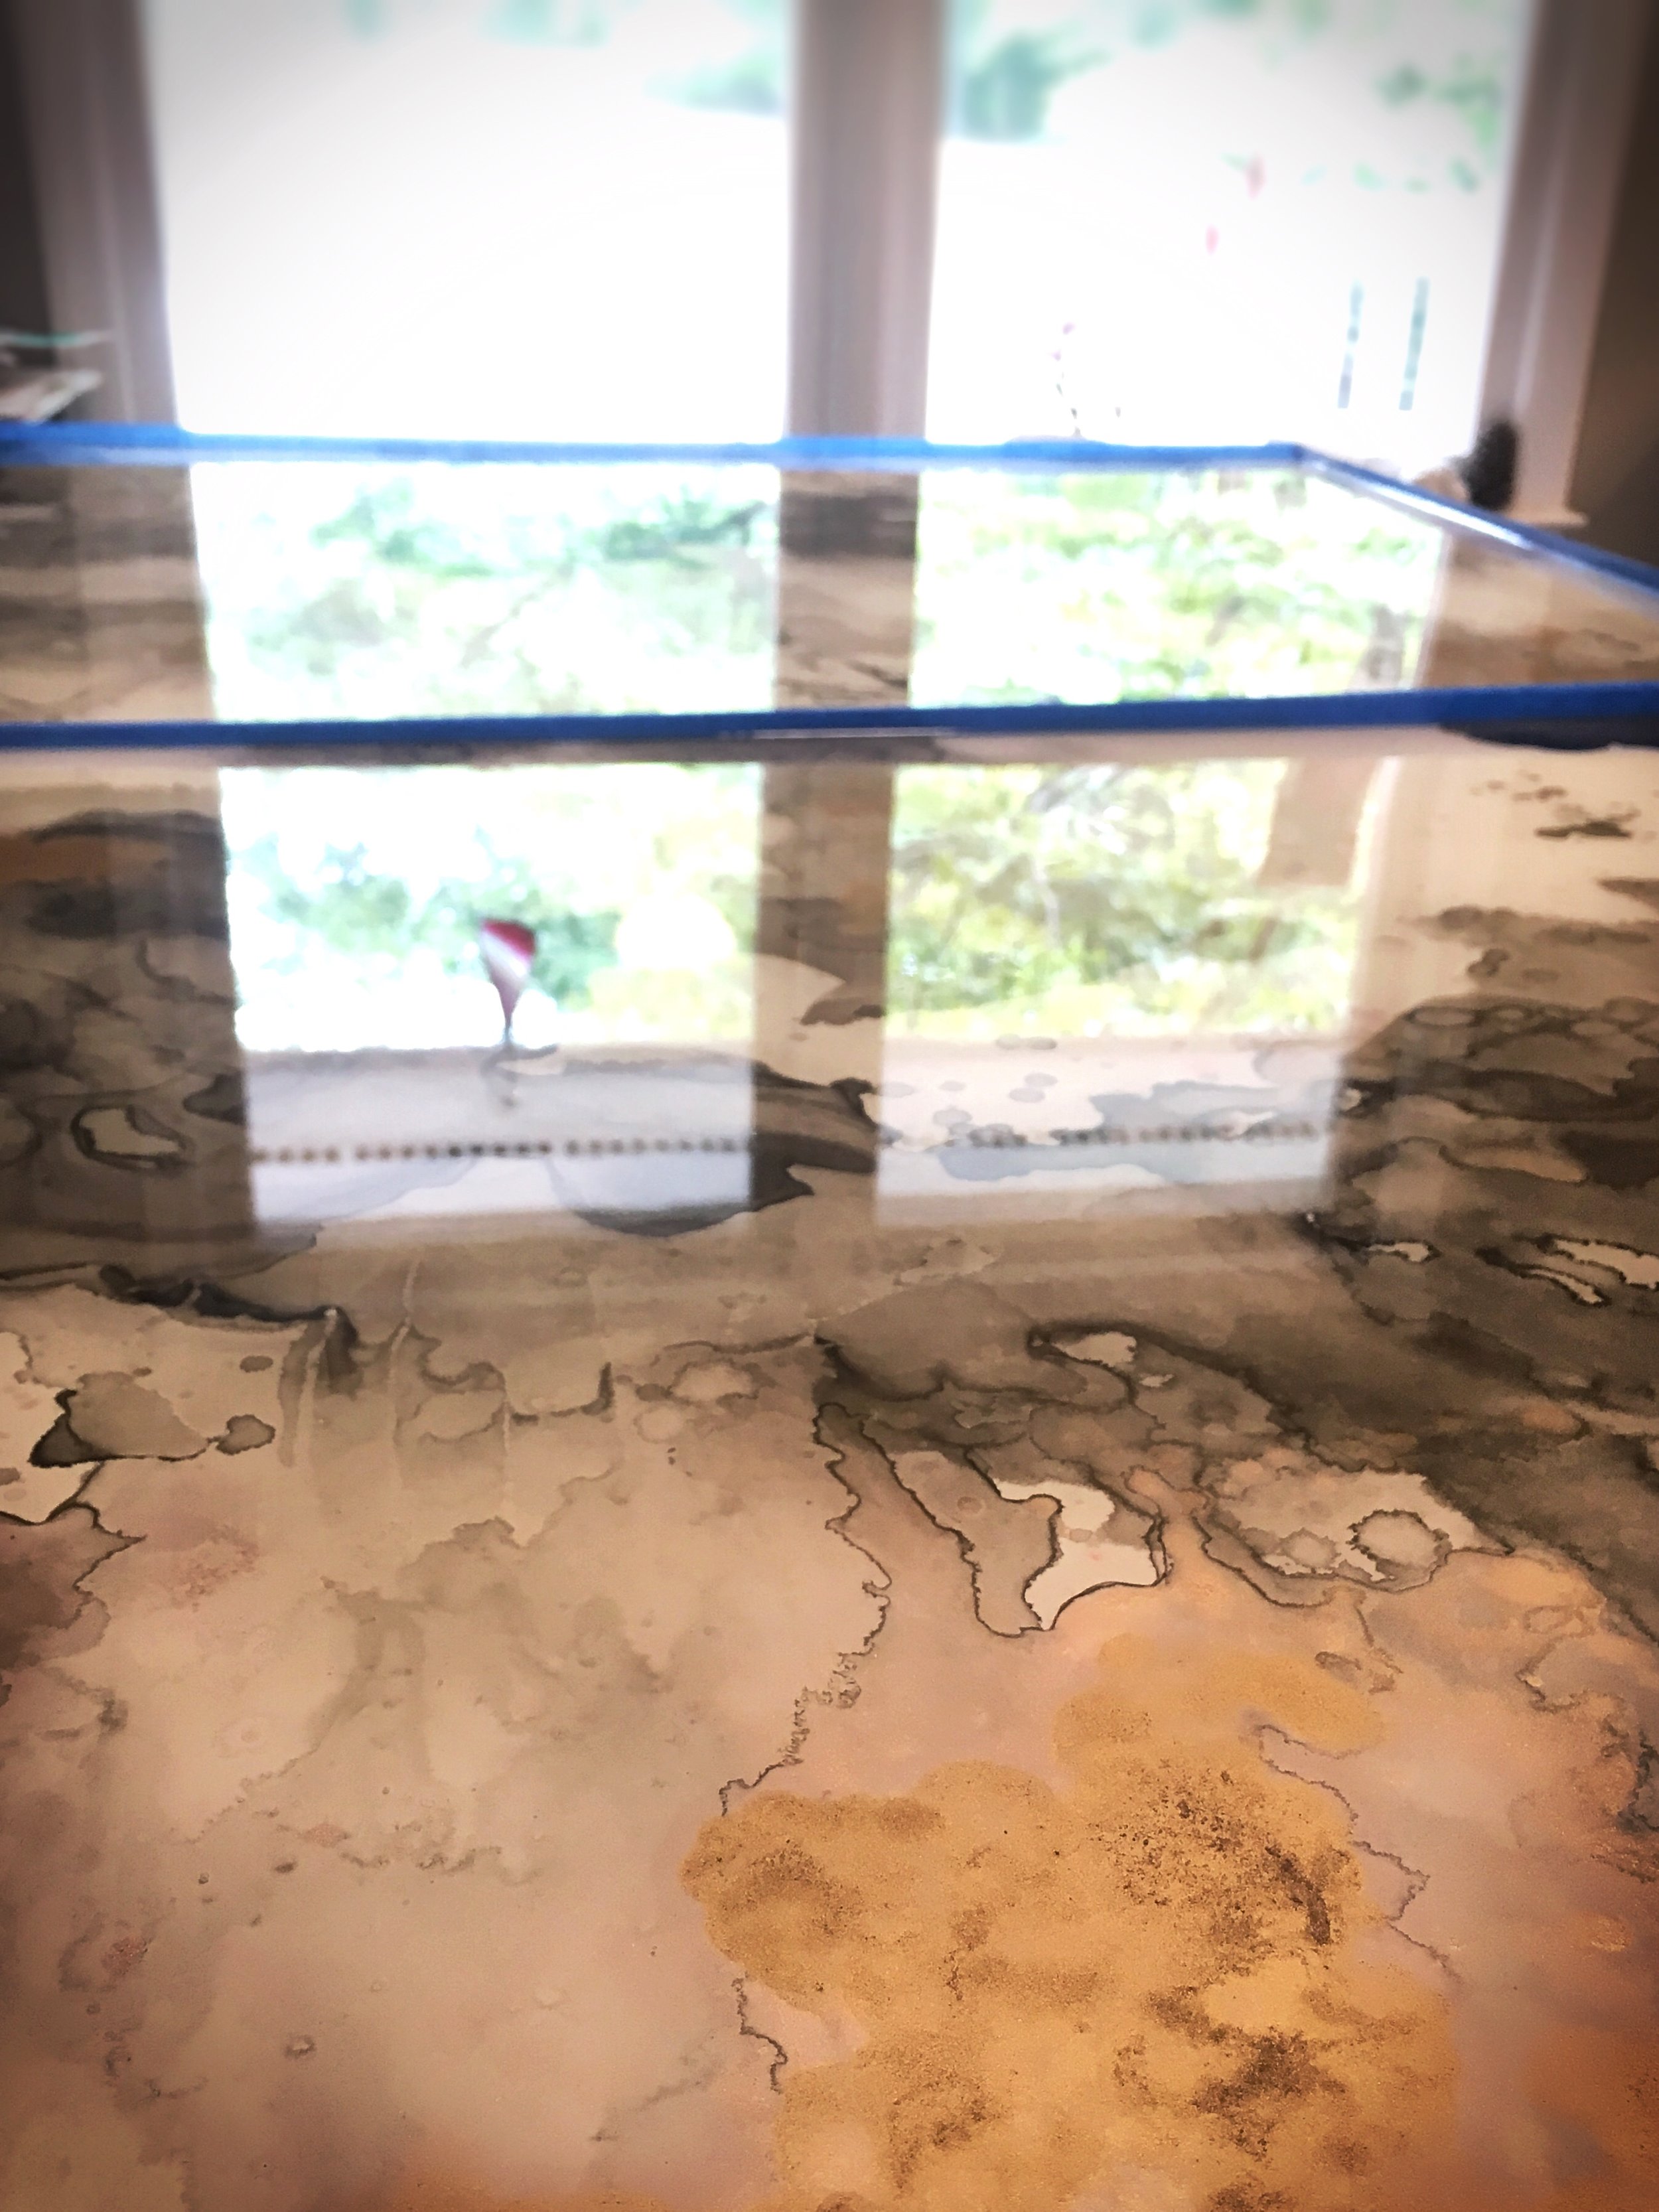
Once all the bubbles have been popped and i have ensured that there are no dust particles or debris floating in the resin, it's time to pray to the resin gods and let it rest. ArtResin takes 8 hours to cure to the touch, but I don't even look at it, breathe on it, or think about it (ok fine, I think about it) for 12 hours minimum. Very rarely and usually due to my own impatience and/or error, if after it cures there are any rogue bubbles, dents, debris or ripples, I can always apply another coat after lightly sanding the surface down. Sometimes I do this anyway and paint in between layers to give an even more layered dimensional effect. Once complete, I sand down the sides of the panels and admire that ArtResin bling!

"And the heavens opened and beamed rays of light unto thine abstract resined painting"...sanding resin always makes me nervous but it is soooo worth it!
If there are any issues at all, however, one of my favorite features of ArtResin's website is their FAQ's page. It has the answers to all of the bajillion questions you may have about their product and process, so you don't have to lose any more sleep at night if they aren't covered them here in my humble blog post. Happy resining! I think that's a verb, right?